


SOCIAL MEDIA AND WEB TOOLS
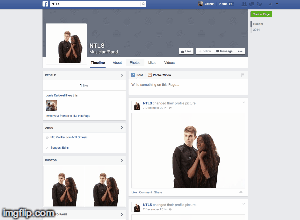
- During the research and planning stage of the project we used Facebook a lot to organise the project and share ideas. We created a group in which everyone could share and post directly to the page for everyone to see.
The group 5 Facebook chat where we could post and the group
chat where we discussed key decisions about the project
Facebook's features, such as the 'seen' tool was really helpful, as it allowed us to tell exactly who had seen which post so that we could get everyone up to date on what was happening. We could also comment on pictures uploaded, which was really useful for our group especially as we were not always available to give feedback to each other as a group due to our lesson timetables being so different.
- Youtube was one of the main research tools we used to find influences for our video. We used the playlist tool to create a list of influential videos which anyone in the group could access and add to, rather than having to create a list of links off site.

The group 5 'influences' playlist on YouTube
The playlist could then be shared and embedded on other sites too which was an added bonus. Uploading research and planning videos quickly and easily for all the group to see anytime they wanted was also a useful feature, which we used when discussing the videos progression and timeline of events.
- Pinterest was a a really helpful tool for all aspects of the project. We used it to find influential photos for makeup, costumes, locations, styles and more. When searching on pinterest we pinned photos we liked to boards we made which could be shared and added to by anyone in the group. It was a really easy way of sharing ideas and also explaining to other members your ideas visually.

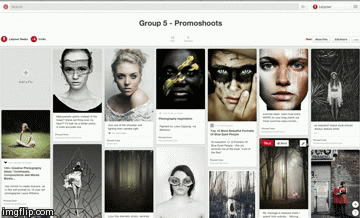
Pinterest moodboards containing influential images for promoshot and artist image
- We used Google hangouts to conduct meetings outside of school hours, as a lot of the time none of us were free at the same time as each other. We called each other, discussed ideas and developed the projects direction from our home computer.

Screenshots from a Google Hangouts session
The really useful thing about using hangouts rather than any other video calling software was that it was part of Google, which meant that apps such as YouTube and Google+ were already embedded into the program and made sharing videos or pages really easy.
MOBILE PHONES
- We used our phones a lot to organise events or meetings over the course of the project as it was an easy way to contact each other at any time and anywhere. Apps such as Google Hangouts and Facebook could also be accessed through our phones as well, which meant we could have meetings or access photos on the go and not necessarily just from home.
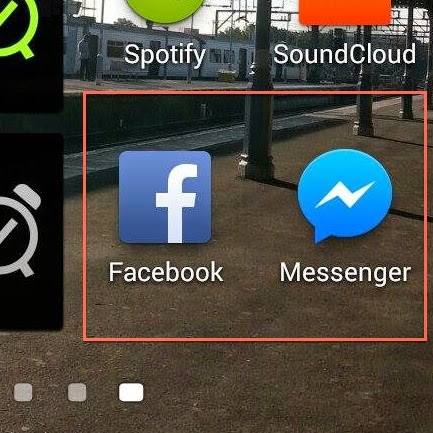

The app icons for Facebook, Facebook Messenger and Hangouts
- As our phones were able to access social media, this meant we could take photos or videos on our phones and then share them online to the group. We even used our phones on test shoots to get an idea of what certain shots would look like. It was also an easy and accessible way of recording the projects progress, either on set or behind the scenes.

Images taken on a phone during a studio session
CONSTRUCTION - PRODUCTION
CANON 5D MKII

The Canon 5D MKII was the camera we used to record the studio footage because of its high quality and professional standard. Recording in 1920 x 1080p with a 16:9 aspect ratio the footage was very much HD. It also allowed us to change settings manually, such as ISO or exposure, which was really helpful in creating the white infinity backdrop.
LEAPFROG LIGHTING DESK
- The Leapfrog lighting desk was used in the studio to create the professional look seen in the video. The lighting desk controlled an array of Arri 1000K Lights, which we could alter depending on how we wanted each setting to look like.

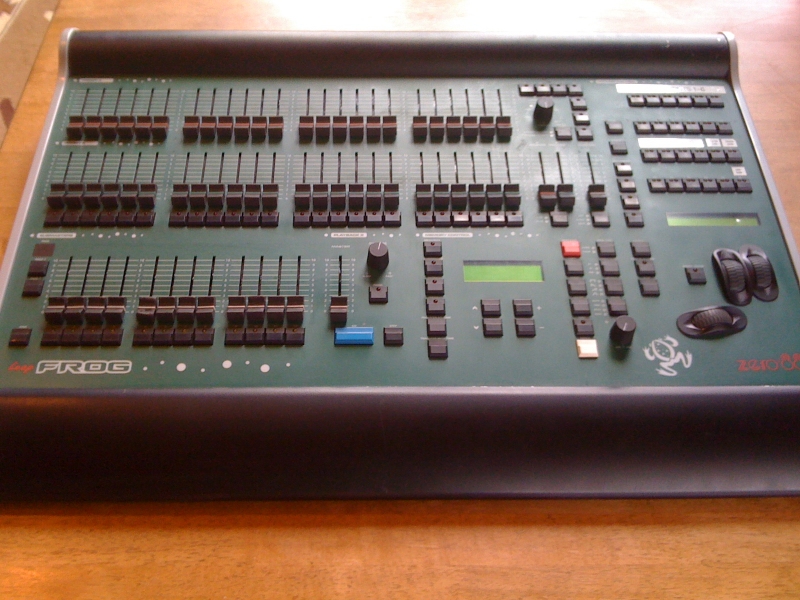
Me working at the lighting desk and the lighting desk itself
We were taught how to use the lighting desk by the media technician, as most of us had not used the desk before the project and had no idea how to control it. One problem we had with the lighting was having to reposition the rigs before every studio session. As we were sharing the studio with other groups, we had to move the lights before each shoot, as different groups had different lighting set ups. This meant a lot of time was wasted, however this was unavoidable, so we had to just light as quickly as possible whilst keeping to schedule.

- Mobile phones were an essential part of the evidencing process, as a lot of the time they were to most convenient method of capturing information. We even used our phones as a way of transporting shoot boards and schedules which was really useful, especially on locations outside of the school where we had to carry all of the kit we were using around with us.
CONSTRUCTION - POST PRODUCTION
ADOBE PHOTOSHOP
- The majority of the album cover was designed on Adobe Photoshop due to the amount of editing and layering that was involved in piecing all of the components together.

The main graphic was really complex and involved using multiple photographs then creating a clipping mask to use a selected area of that photo.


I created the graphic using circles of different sizes, then positioned them so that they fitted next to each other. Editing the photos that feature on the album cover was also done on Adobe Photoshop.
- Adobe Photoshop was really useful for editing the large amount of promotional photos we had taken both in and out of the studio. The studio photos were relatively easy to edit as they were all pretty similar lighting wise, however there were a few problems that held back the process slightly. The photos taken in the studio had a line across the back of them where the curtain across the back hit the floor, which had to be edited out for each photo in order for the infinity effect to work.
Also lighting in some sets of photos were different than others as they were taking on different days, meaning that the settings changed such as brightness, contrast, vibrance and saturation had to be adjusted for each individual set of photos which consumed a lot of time.

The original images (full colour, unedited) and the result (monochrome, edited)
- As we did not actually make any of the merchandise advertised on the NTLS website, we had to photoshop the logo onto various pictures of items found on retail websites.


ADOBE ILLUSTRATOR
- Originally the NTLS logo was hand drawn, so in order to transfer it to a crisp digital file, Adobe Illustrator was used. The hand drawn image was scanned in and once in Illustrator, I used a tool that traced the image and created an editable digit able version. I neatened up the edges of the logo and straightened up the lines until the final logo was complete.

- To edit our footage we used the software Adobe Premiere Pro. Using Adobe Premiere Pro was useful in a number of ways when editing the video, as we we able to edit the footage in a non-linear fashion, meaning it didn't matter what order we edited our footage in.

The premiere timeline for the video edit
Adobe Premiere Pro was also useful as we could have multiple sequences when editing and could test out editing techniques on a separate sequence from the final edit. We used these separate sequences to create short tests, creating narratives for the VHS parts that we could change around and reorder if we needed to before putting them onto the final timeline.
On top of the standard editing techniques used for the timeline, we used some of the editing tools to alter the framing or speed of shots. Where shots were too wide, we cropped the image by using the scale tool to increase the zoom, then the positioning tool to change its position in the frame. If a shot was too fast, we slowed it down using the speed duration tool.

The annotation shows how the video was put to 50% speed


The grading interfaces within Adobe Premiere Pro

- Honestech was an external software that we downloaded in order for us to be able to capture the footage off of the VHS camera. The software was really straightforward to use and meant that the footage was of a format that we could edit into the final video of our project. The VHS camera was also really easy to use but we had to be carful each time we went out to record footage as it was analogue. This meant it recorded onto tape and would rewrite over any footage we had not taken off of the camera. The battery life of the camera was quite short as well.
The main problems we had with the camera were that it shot in 4:3 and not 16:9 and also the fact that the VHS automatically dated footage with a watermark that showed up on screen and could not be removed. Both of these problems were solved in post production though so the project was not jeopardised.


The black bars and box around the images are a result of the VHS filming in 4:3

An example of the video watermark showing the date we filmed the footage
ADOBE AFTER EFFECTS
- We did not originally intend to have to grade in Adobe After Effects but because of problems that arose with our footage we were forced to in the end. Some shots in our music video were too over exposed and the editing software within Adobe Premiere Pro did not allow us to correct it. To fix this problem, we had to open said shots in After Effects, which allowed us to isolate specific colours, which wasn't difficult luckily.

Once in After Effects, we used a plugin called Colour Finesse

The interface for Colour Finesse was a lot more complex than Procamp or Threeway Colour Corrector, but it didn't take long to learn how to use, as the principals of using sliders to change certain aspects of the image were the same.

- When creating the NTLS website, we decided to include various social media links to improve audience interactivity with the artist. We created a Facebook page, a Twitter page and an Instagram page which we updated as frequently as possible over the course of the project, with images and posts relating to the release of the album.
 - The Wix website creating tool was a brilliant app that we used to create a mock website for the artist NTLS. This was good technology for us to use as it was designed to be easy to use, and didn't require HTML coding, which would have been difficult for us to learn. A problem I found with Wix was that we were limited slightly with creativity, as we were only able to use preset widgets and apps provided by Wix. On the other hand, this meant that we could easily add features to our website, such as a live feed of the band's social media pages that we may have not known how to add if we had had to code the widgets ourselves.
EVALUATION
SOCIAL MEDIA AND WEB TOOLS
- We also used an online survey conductor called SurveyMonkey, which allowed us to collect and analyse feedback. SurveyMonkey was good to use as it was easy and straightforward to use for those filling out the survey. We were able to ask as many questions as we wanted and were able to customise the survey to get the best data possible, asking both qualitative and quantitative questions, depending on what fit best. It also allowed for anonymous responses, so those filling it out didn't feel pressured to give details they did not want to give.


- After writing up a survey on Surveymonkey, we posted a link to both the video and survey on our Facebook walls for people to fill out. The results were easy to analyse as they were presented on the website in tables.

QUICKTIME PLAYER

QuickTime Player is an application that allowed me to record my computer screen. I used this application to show how websites, apps and software worked, recording it in a video and then converting it to a GIF

MOBILE PHONES
- We also used our mobile phones to record audio and video interviews of people reviewing our products from the project.
No comments:
Post a Comment